Kami 抽取通用组件封装公用组件库

12 个月前(已编辑)
编程 / ,
1328
2
这篇文章上次修改于 8 个月前,可能部分内容已经不适用,如有疑问可询问作者。

阅读此文章之前,你可能需要首先阅读以下的文章才能更好的理解上下文。

背景

写 Kami 已将近三年。有些通用组件也想抽离出一个组件库,供外部使用,或许也有想法以后有时间再写一个新风格了(苦逼社畜)。

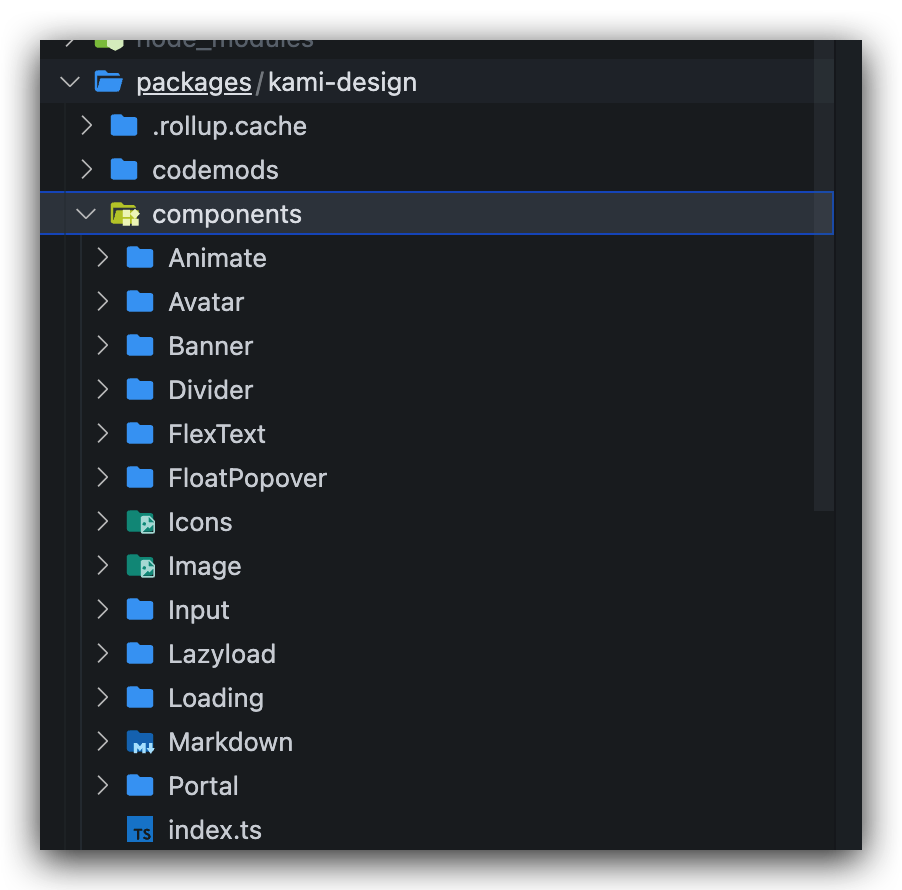
那么就开始抽离通用组件库了。先看看目前 kami 的组件目录结构。

.src/components
├── app        # 存放 app 相关组件
├── biz        # 业务组件
├── in-page    # 为页面服务的组件
├── layouts    # 布局
├── universal  # 通用组件
│   ├── Animate
│   ├── Avatar
│   ├── Banner
│   ├── ClientOnly
│   ├── CodeBlock
│   ├── Divider
│   ├── FlexText
│   ├── FloatPopover
│   ├── FontIcon
│   ├── IconTransition
│   ├── Icons
│   ├── Image
│   ├── ImageTagPreview
│   ├── Input
│   ├── LampSwitch
│   ├── Lazyload
│   ├── LikeButton
│   ├── Loader
│   ├── Loading
│   ├── Logo
│   ├── Markdown
│   ├── Mermaid
│   ├── Modal
│   ├── Notice
│   ├── NumberRecorder
│   ├── Outdate
│   ├── Overlay
│   ├── Pagination
│   ├── Portal
│   ├── RelativeTime
│   ├── SliderImagesPopup
│   ├── Tag
│   ├── TimelineListWrapper
│   └── Transition
└── widgets     # 业务小组件

其实在之前就对 kami 的组件分过几大类了,其中 universal 已经是通用组件了,而这次我们要把这些组件封装成组件库。

第一期,可以仅仅抽离其中几个组件试试效果。

预备工作

首先需要把项目转换成 monorepo,然后引入 rollup 等打包工具。由于我的项目使用 pnpm 管理,这里很快就可以转换成 monorepo。创建 pnpm-workspace.yaml

packages:
  - packages/*

创建 packages 目录。我这里预想将包名设定为 kami-design,新建 packages/kami-design,初始化好 kami-design。

cd packages/kami-design
npm init -y

修改 packages/kami-design/package.jsonname@mx-space/kami-design 方便以后发包。

移动组件位置

之后,就需要把 src/components/universal 需要抽离的组件移动到 packages/kami-design/components 内。

移动位置之后,项目内原本引用这个组件的 import 可能会被更换为一个不正确的路径。比如:

import { Image } from '../../../../packages/kami-design/components/Image'
import { Image } from '~/../packages/kami-design/components/Image'

这都不是我们想看到的,业务内组件引用不应该是从外部 package 引用。我们期望看到:

import { Image } from '@mx-space/kami-design/components/Image'

为了实现这个方式导入,我们需要改 NextJS 的配置文件和根 tsconfig.json。

// next.config.js

module.exports = {
  // ...
  webpack(config) {
     config.resolve.alias = {
      ...config.resolve.alias,
      // your aliases
      '@mx-space/kami-design': path.resolve(
        __dirname,
        './packages/kami-design',
      ),
    }
    // ...
    return config
  }
}
// tsconfig.json
{
  "paths": {
             // ...
      "@mx-space/kami-design": [
        "../packages/kami-design"
      ],
      "@mx-space/kami-design/*": [
        "../packages/kami-design/*"
      ]
    }
}

修改完上面的文件后,NextJS 编译和 TypeScript 的提示都会正常工作了。

那么之后就是手动查找替换不正确的 import 路径了。

配置打包工具

完成这上一步后,项目应该能回到正常状态了。接下来要解决的就是组件库打包的问题了。

首先我们需要一个入口文件,用于导出供外部使用的组件。例如:

// packages/kami-design/index.ts
export { Markdown } from './components/Markdown'
export { Banner } from './components/Banner'
export { Divider, DividerVertical } from './components/Divider'
export { FloatPopover } from './components/FloatPopover'
export { ImageLazy } from './components/Image'
export type { ImageLazyRef } from './components/Image'
export { LazyLoad } from './components/Lazyload'
export type { LazyLoadProps } from './components/Lazyload'
export { RootPortal } from './components/Portal'

由于组件都用到了 CSS module,所以还是需要配置一下 PostCSS。这边可以直接复制或者软连一个根的 postcss.config.js。然后就是配置 rollup.config.js。

当然,先安装一下需要的依赖。

# packages/kami-design
pnpm i -D @rollup/plugin-commonjs @rollup/plugin-node-resolve @rollup/plugin-typescript esbuild postcss postcss-import postcss-nested postcss-preset-env rollup rollup-plugin-esbuild rollup-plugin-peer-deps-external rollup-plugin-postcss

然后,写 rollup.config.js。

// @ts-check

import fs from 'fs'
import path from 'path'
import esbuild, { minify } from 'rollup-plugin-esbuild'
import peerDepsExternal from 'rollup-plugin-peer-deps-external'
import css from 'rollup-plugin-postcss'

import commonjs from '@rollup/plugin-commonjs'
import { nodeResolve } from '@rollup/plugin-node-resolve'
import typescript from '@rollup/plugin-typescript'

const packageJson = JSON.parse(
  fs.readFileSync('./package.json', {
    encoding: 'utf-8',
  }),
)
const globals = {
  // @ts-ignore
  ...(packageJson?.dependencies || {}),
}

const dir = 'dist'
const external = ['react', 'react-dom', /^lodash/, ...Object.keys(globals)]

const plugins = [
  nodeResolve(),
  commonjs({
    include: 'node_modules/**',
  }),
  typescript({
    tsconfig: './tsconfig.json',
    declaration: false,
    sourceMap: false,
  }),
  css({}),

  // @ts-ignore
  peerDepsExternal(),

  esbuild({
    include: /\.[jt]sx?$/,
    exclude: /node_modules/,
    sourceMap: false,
    minify: process.env.NODE_ENV === 'production',
    target: 'es2017',
    jsx: 'transform',
    jsxFactory: 'React.createElement',
    jsxFragment: 'React.Fragment',

    tsconfig: 'tsconfig.json',

    loaders: {
      '.json': 'json',

      '.js': 'jsx',
    },
  }),

  {
    name: 'replace-env',
    transform(code) {
      return {
        code: code.replace(`process.env.NODE_ENV === "development"`, false),
      }
    },
  },
]

const __dirname = path.resolve(import.meta.url.replace('file://', ''), '..')
const envDtsPath = path.resolve(__dirname, 'env.d.ts')

/**
 *
 * @param {string} filename
 * @returns {import('rollup').RollupOptions}
 */
const buildEntryFileConfig = (filename) => {
  const baseFilenameWithoutExt = filename.replace(/\.[jt]sx?$/, '')

  return {
    input: `./${baseFilenameWithoutExt}.ts`,
    // ignore lib
    external,

    output: [
      {
        file: `${dir}/${baseFilenameWithoutExt}.cjs`,
        format: 'cjs',
        sourcemap: false,
      },
      {
        file: `${dir}/${baseFilenameWithoutExt}.min.cjs`,
        format: 'cjs',
        sourcemap: false,
        plugins: [minify()],
      },
      {
        file: `${dir}/${baseFilenameWithoutExt}.js`,
        format: 'esm',
        sourcemap: false,
      },
      {
        file: `${dir}/${baseFilenameWithoutExt}.min.js`,
        format: 'esm',
        sourcemap: false,
        plugins: [minify()],
      },
    ],
    plugins: [...plugins],

    treeshake: true,
  }
}

/**
 * @type {import('rollup').RollupOptions[]}
 */
const config = [
  buildEntryFileConfig('index.ts'),
]

export default config

按照上面配置,默认 .js 为 ESM,因此,我们需要把 package.json 加上 "type": "module"。趁机会也修改下 package.json

{
  "name": "@mx-space/kami-design",
  "version": "0.0.0",
  "main": "dist/index.js",
  "module": "dist/index.js",
  "types": "dist/index.d.ts",
  "type": "module",
  "license": "MIT",
  "exports": {
    ".": {
      "type": "./dist/index.d.ts",
      "import": "./dist/index.js",
      "require": "./dist/index.cjs"
    },
    "./dist/*": {
      "type": "./dist/index.d.ts",
      "import": "./dist/*",
      "require": "./dist/*"
    }
  },
  "files": [
    "dist",
    "lib",
    "esm",
    "readme.md",
    "tsconfig.json",
    "types",
    "src"
  ],
  "scripts": {
    "prebuild": "rm -rf dist types",
    "build": "rollup -c"
  },
  "peerDependencies": {
    "react": "^16.8.0 || ^17.0.0 || ^18.0.0",
    "react-dom": "^16.8.0 || ^17.0.0 || ^18.0.0"
  },
  "dependencies": {
   // ..
  },
  "devDependencies": {
   // ...
  }
}

现在,执行 npm run build 应该能 work 了。在 dist 生成 ESM,CJS 的产物了。

生成类型

只有打包产物,没有打包类型也不行的。

可以使用 dts-bundle-generator 生成。

pnpm i -D dts-bundle-generator

配置一个 tsconfig 专为生成类型的文件。

// tsconfig.types.json
{
  "extends": "./tsconfig.json",
  "compilerOptions": {
    "module": "commonjs",
    "outDir": "./types",
    "declaration": true,
    "declarationMap": false,
    "isolatedModules": false,
    "noEmit": false,
    "allowJs": false,
    "emitDeclarationOnly": true,
    "skipLibCheck": true,
    "typeRoots": [
      "./node_modules/@types",
      "../../node_modules/@types",
      "./@types",
    ],
  },
  "include": [
    "**/*.ts",
    "**/*.tsx",
    "./*.d.ts"
  ],
  "exclude": [
    "__tests__/**/*",
    "**/*.test.ts"
  ]
}

打包类型。

npx dts-bundle-generator -o dist/index.d.ts ./index.ts --no-check --silent --project ./tsconfig.types.json

会在 dist 生成 index.d.ts。

由于 dts-bundle-generator 不认识全局变量和 *.module.css。所以可以在 index.ts 首行加入 /// <reference path="./<<your_global_env.d.ts>> /> 声明文件。

例如:

// index.ts
/// <reference path="./env.d.ts" />

// ...
// .env.d.ts
declare module '*.module.css' {
  const classes: { [key: string]: string }
  export default classes
}

发布

接下来就可以发布测试了。

修改 package.json 的 version 后发布到 npm。

快速发布推荐使用 bump-version,一个简单的 Bump 工具,支持 Hooks 和 Changelog 生成。有机会再写一篇文章介绍下。

后记

折腾过程中,还遇到了很多问题。

比如,

  • 我使用的是 WindiCSS,我以为如何去打包。
  • 如何打包每一个组件,都生成一个单一的包。
  • 以及,如何为每一个组件生成一个单一的类型声明。

这些问题,以后有机会再罗列。已在 kami-design 中实践,参考 kami-design

底下评论区还请大佬指教。

常见

  • Kami: 一个可爱的前端主页。

Kami 已完成组件库迁移。

评论区加载中...